(7) Apply firm, even pressure to the autoinjector until it functions. Push the
autoinjector hard into the muscle to ensure that the needle penetrates both the clothing
and skin. Firm pressure automatically triggers the coiled spring mechanism in the
autoinjector. This plunges the needle into the muscle and, at the same time, forces fluid
through the needle into the muscle tissue. Do not use a jabbing motion.
(8) Hold the autoinjector firmly against the muscle for at least 10 seconds.
(The interval of 10 seconds may be estimated by counting one thousand and one, one
thousand and two, etc., through one thousand and ten).
NOTE:
You may have a surprise/hurt response to the long needle penetrating the
thigh/buttock and respond by jerking or pulling the needle out, resulting in the
medication being expelled outside of the injection site. If so, obtain another
atropine autoinjector and repeat the process.
(9) Remove the atropine autoinjector from the injection site by pulling it out
at a 90 angle.
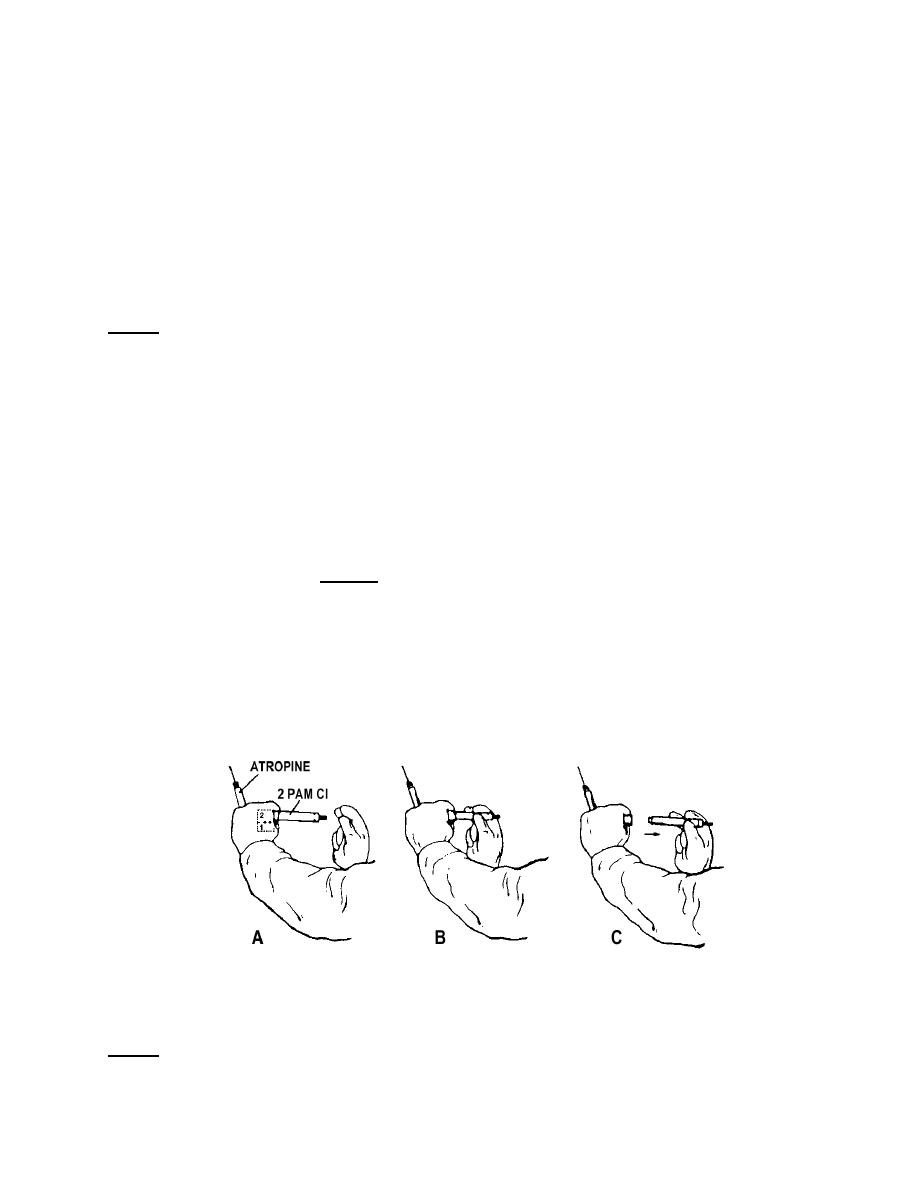
(10) Place the used autoinjector carefully between two fingers of the hand
holding the plastic clip (see figure 8-6 A).
(11) Grasp the large (2-PAM chloride) autoinjector remaining in the clip with
the thumb and two fingers without covering or holding the needle (black) end (figure
8-6 B). Putting pressure on the black end could cause the autoinjector to function
prematurely during removal.
(12) Using your thumb and two fingers, pull the 2-PAM chloride autoinjector
out of the clip with a smooth motion (figure 8-6 C). This is basically the same method
as used with the atropine autoinjector.
Figure 8-6. Removing the 2-PAM chloride autoinjector from the MARK I clip.
NOTE:
You can now drop the empty plastic clip, but do not drop the used atropine
autoinjector.
IS0877
8-9


 Previous Page
